.png)
My Favorite Things: Art Supplies and Equipment
- Glory Creative

- Jan 15, 2021
- 5 min read
Updated: Mar 30, 2021
I have been busy crafting and doing art and am using some new Art products I would like to share with you. Well, at least they were new to me. You might be an expert as a creative, but I am a novice. I am excited about anything which aids me in my process.
It is fun for me to try out new materials and products to see how they work and what I can do with them. I have found five new products to use and would like to share them with you along with my review of each.
SHOTBOX Photo Studio
First I would like to tell you about the SHOTBOX. This is a brand name for light box from what I understand. I have seen some videos of people building their own with a cardboard box. That is ok, too. I wanted something durable and collapsible. I purchased mine from Michael's craft store.
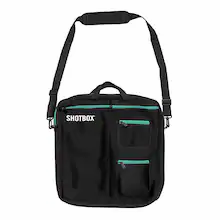
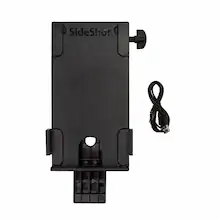
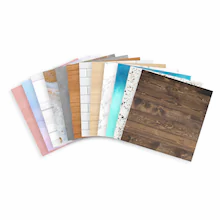
The manufacturer has a website and you can purchase there as well. In addition, I bought a set of printed palettes and a set of infinity screens as well as a carrying case. The side arm is extra, so I purchased this too. We waited for a sale and were able to get a 20% discount. Price will vary depending on sales or your membership status. If you are a teacher, you will receive an extra 15% off and for seniors, it is an extra 10%.
Photos from Michael's Craft Store.
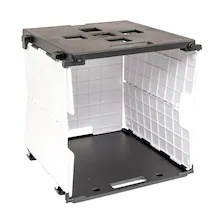
Photos of SHOTBOX and supplies
How to set up and Use a Shotbox
I watched some videos on YouTube and through Michaels on-line classes to figure out how to set it up and use it. Most of what I found, besides the set up, were people teaching how to save photographs or for product photography. Many crafters use it to catalog their old photos. Honestly, I am not ready to tackle that monster yet. I have several boxes of photos and it's not on the front of my to-do list. But, if I do decide to get the pictures organized, it will be great!
I bought the shot box two months ago and found I am keeping it set up so it will be quick for me to use. It doesn't take long to set it up but while I am doing various projects, it is just more convenient to keep it set up and ready to use.
How I Use My Shotbox
I have been making a cookbook for my kids and it works great to take shots of the dishes using the Shot box. There is adjustable lighting, a variety of palettes for the floor of the box and and background. I can also use various green screens for the back. I have been able to capture different angles, too. This is definitely helping me in the process of capturing photos for he cookbook.
I blog about recipes and eating healthy which leads to taking photos of the dishes for the blog. I have found using the SHOTBOX easier than trying to get the correct lighting with conventional photography methods.
Another way I have been using my Shot box is for product photography for my Etsy Shop. Again, it has adjustable lighting which helps the product stand out with amazing lighting! It is convenient to pop the products into the Shotbox and position them for the photo. Previously I was using a table and trying to position foam board for lighting. I am pleased with the mechanics of the SHOTBOX for adjusting lighting and glare.
The last way I have been using my Shotbox is for my blog. If I have something I want to show which will fit in the Shot Box, I use it to capture the picture. I have some items I will be shooting today. The ease and flexibility it has provided has been worth the cost for me!
How to use a ShotBox Video tutorial from Michael's.
Sample Pictures using my Shot Box


Summary
You can create professional level content at home! This portable photo studio is just the thing to style shots, process videos, archive your content, and more. It features built-in studio lights for even coverage, an on/off dimmer switch, glare shields to keep images clean, and a collapsible frame for easy set up, take down, and storage.
Overall, I am extremely pleased with it. It is especially convenient to store as well. All the pieces and parts fit into the bag. You can use the camera on your phone or DSLR camera.
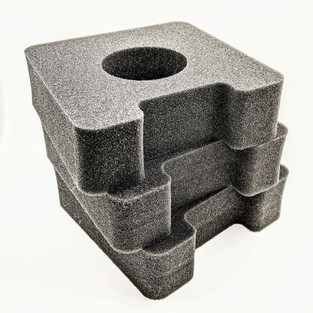
DSLR Donuts - Set of Three Sizes for any DSLR camera
These DSLR Donuts make it very easy to use your digital camera with your SHOTBOX to shoot straight down.
Just insert your lens into the best-sized donut and position it on the roof of the SHOTBOX pointing down. This simple approach stabilizes your larger camera for the best hands-free results.


These DSLR Donuts make it very easy to use your digital camera with your SHOTBOX to shoot straight down. Just insert your lens into the best-sized donut and position it on the roof of the SHOTBOX pointing down. This simple approach stabilizes your larger camera for the best hands-free results.
I got these for Christmas. They come in a package of three sizes. Here is the website SHOTBOX.
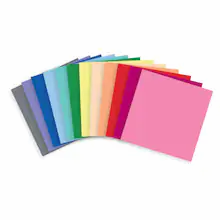
3. Vanstek 15 Colors Retractable Erasable Gel Pens
Retail price on Amazon.
I heard about erasable gel pens and had to try them. There are several different versions on Amazon, but I didn't want to spend a ton of money so I bought the Vanstek brand. I have found them enjoyable to use. My main purpose for them has been to us in my planner. There are lots of uses and I will cover a little about them and you can decide for yourself.

Review
Gel Pens are erasable with the eraser at the top and retractable by pressing the side clicker clip down. They write like gel pens and erase like pencils . I would rather use colored pens for my planner and if I make a mistake, I can erase it and keep my planner neat and clean.
They come in 15 Bright Colors: they have a retractable design so there is no risk of losing the caps.
They have a soft rubber grip making writing with the pens comfortable to hold.
Great pens for coloring, doodling, scrapbooking, sketching, drawing, doodling, writing and getting creative.
Tip: Allow gel to dry before erasing.
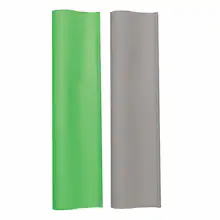
Huion LB3 Wireless - Tracing Light box
I received this light box for Christmas and I am REALLY enjoying using it. I use it to trace pictures I want to paint and for brush lettering and Calligraphy practice.

Pictures from Amazon.
Features
Battery - Can support itself for approximately 2 hours when turned on with a fully charged battery; Takes 1.5 hours to fully charge.
Thin and Portable - Thickness 0.31 inch; Work Surface 16 by 12 Inches; Weight 0.32 ounces
Light Adjustment - Gradual Light Changing with Touch Sensitivity, adjustable to find your ideal lighting
Multiple Usage - can be used for a wide variety of tasks including craft projects, fabric design, transferring sketches or drawings, lettering, calligraphy, sewing and more.
Personally, I like the slim design, lightweight, adjustable light and battery feature. There is a metal clip to hold paper while tracing and a numbered grid for measuring.


Picture using light box with art project.


Comments